Monday, 27 January 2014

In search of some inspiration and because the cafe has the best scones ever, yesterday I went to the Harley Gallery near Worksop to see an exhibition of tapestry by Jilly Edwards. The work is based on journeys through the landscape and consists of panels, strips and pieces that are installed in their own exhibition cases. I like the way that these small samples become focussed and precious.


 Photos by author, tapestries by Jilly Edwards


The thing that struck me most was that she had abstracted the aspects of the landscape that interested her and had used these to create blocks and slashes of colour and texture, sometimes using text, but all evoking and suggesting the subject not merely representing. This is something I am struggling with in my own sketchbook work. Fortunately, Jilly was on hand to answer my questions. I came away from the exhibition, not only inspired but also armed with some helpful advice. 

Tuesday, 21 January 2014

I've finished the project that has been ongoing since September. This one was based on the character and qualities of skin, looking at folds and wrinkles. I had high hopes when I started, thinking that I could use high twist linen and double cloth to achieve a range of different distorted fabrics. To some extent this has happened, though I would have liked a more refined product as a result. Anyway, I guess the purpose of experimenting is to find out what happens and then to learn from the experience.

These are the resultant samples:


The next step was to try to put these ideas into practice. My idea was to use the fabric to make something that could be work to emphasise the skin. I'd been looking at the way that ruffs frame the face and thought that the pleated fabric would work well to do this. I wove a length of double cloth using natural linen on the top layer and high twist linen on the bottom, then wove the top layer in high twist leaving long floats at the back and then weaving both layers together with high twist. The resultant cloth was made up into the ruff, trimmed with small pearl beads and then placed in boiling water to form the pleats. I'm pretty pleased with the outcome. 


Tuesday, 24 December 2013

Folds and Pleats

Well this is the thing, my blog has been neglected for far too long and so I am starting my New Year's resolution today. I am currently completing the 'Skin' project and am working on a folded/wrinkled sample. This is woven on a double cloth warp with the top warp in stable plied linen, the bottom is high twist. I have woven loose pleats and have then altered to tension of the top layer to achieve distortion and bubbles in the folds. To alter the tension, I've used a high tech implement - a pencil and masking tape - which seems to work well, even though it is tricky to weave. I am happy with the results on the loom; the next step is to cut it off and to steam the sample to see if this tensions up the folds. Watch this space!


Monday, 10 October 2011

Felt Pot Experiments continue

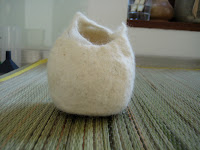
Today's challenge is to add colour and to see whether the tumble dryer part of the process can be used more extensively. Same mould of tights and beans was used as a starting point. So the first pot today uses red as the first layer of colour, then dark chocolate brown to build up the body. I gave this some work by hand to start off the process, then put it in the tumble dryer for about 30 minutes. I ended up with a tight 'egg'. I cut off the top with a scalpel and tipped out the beans.


I don't think this is particularly successful. The felt is lumpy and the colour inside isn't particularly strong. It does look good as work in progress! Think I'll go back to doing more of the felting by hand as you can control the quality.

I also made a white pot for decoration, which I'll put up next on the blog.


Thursday, 6 October 2011

Felt Pot Experiments continue

I was thinking that I would like to make the felt more robust and to be able to rub the felt both from the inside of the pot and the outside at the same time. I thought that if I made a different kind of mould with friction beads inside, this might work.


So I made a mould using a cut off of a pair of tights filled with aduki beans. 


I then applied the wool wisps in the same way as previously but in more dense layers. 


The pot was then rolled around on the felting mat. This was very much like kneading dough and I found that I could be quite brutal, slamming the mould down and pushing it around.

I also though that it would be a good idea to step up the heat to aid the felting process, so I gave the pot several shots of steam from a steam cleaner. 

It became clear that this was working very well and that the felt had formed into a tougher shell than in the previous experiments.

So I then put the pot in the tumble dryer, wrapped up in a piece of net curtain, a bit like a steamed pudding.


I gave it 15 mins on a high temperature and then took it out, opened up the tights and removed the beans. The empty tights were then peeled away, the pot rinsed and left to dry.


This has resulted in a much less fragile object. I am going to see what this technique offers in the next few experiments.

Wednesday, 5 October 2011

Felt pot experiments

Well, these are the first attempts in a series of felt making
experiments. I am testing how much wool to use to get the 
shape to hold and also to see how little you can use and 
keep some of the translucency. I have used a balloon as the
form and then have worked alternate layers of horizontal 
and vertical wool wisps, spraying the balloon first with a 
dilution of washing up liquid and water and spraying as
the wool is layered up. The green bowl is quite fragile, 
the larger pot is thicker and heavier but I had to inflate another 
balloon whilst initially drying out the pot to keep the shape.


Once the layers are in place, I then spent about 15 mins 
for the small green one and 30 mins for the larger pot, 
rubbing and massaging the felt using both a felting mat 
(beach mat) and just by hand. This was a bit like a scalp 
massage and was quite nice to do!

Friday, 30 September 2011

frei-tag lab's birthday

frei-tag lab is born today  


frei-tag - Friday
Friday - O.E. frigedæg "Frigga's day," from Frige, gen. of Frig , Germanic goddess of married love
frei-tag - 'free day'


lab - abbreviation of laboratoy
laboratory - c.1600, "building set apart for scientific experiments," from M.L. laboratorium "a place for labor or work," from L. laboratus, pp. of laborare "to work"


frei-tag lab is intended as a 'show and tell' space for experiments in crafting and making. 


frei-tag lab will be updated every Friday with work from during the week.


frei-tag lab is speculative. Hopefully, some experiments will work, others are likely to fail. Here's hoping that some of the failures are spectacular!